As everyone’s climate is changing so is mine too here in Chicago. The summers are getting warmer and the second floor in my house is getting harder and harder to keep cool. In this blog post I’m going to cover how I solved this problem using Automation, 3d printing, a register booster fan, and a smart outlet.
Table of Contents
- Prerequisites
- Knowledge
- Making Things Happen
- Home Assistant Automation Routines
- Re-Directing the Air Flow
- Final Words
Prerequisites
To be able implement the same or similar solution you will need
- An automation hub, I use Smart Things.
- Home Assistant running on your home network and able talk to your automation hub.
- Smart outlet connected to your hub. Since Im using Smart Things I opted for a zigbee one. Again I bought the cheapest one I could find.
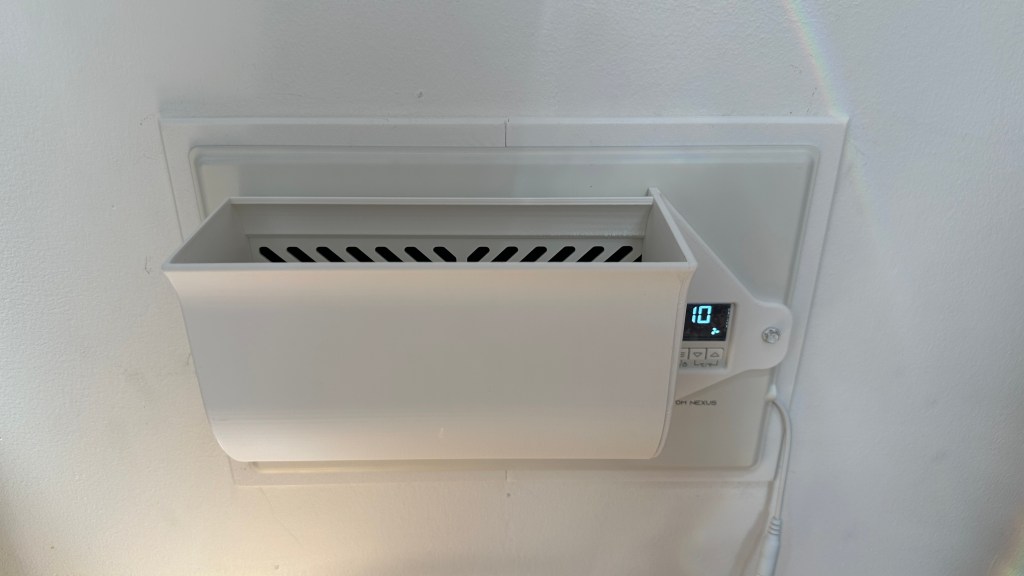
- Register booster fan, I bought this one, the dumbest, cheapest one I could find. When selecting a booster fan make sure to get the correct size for your register.
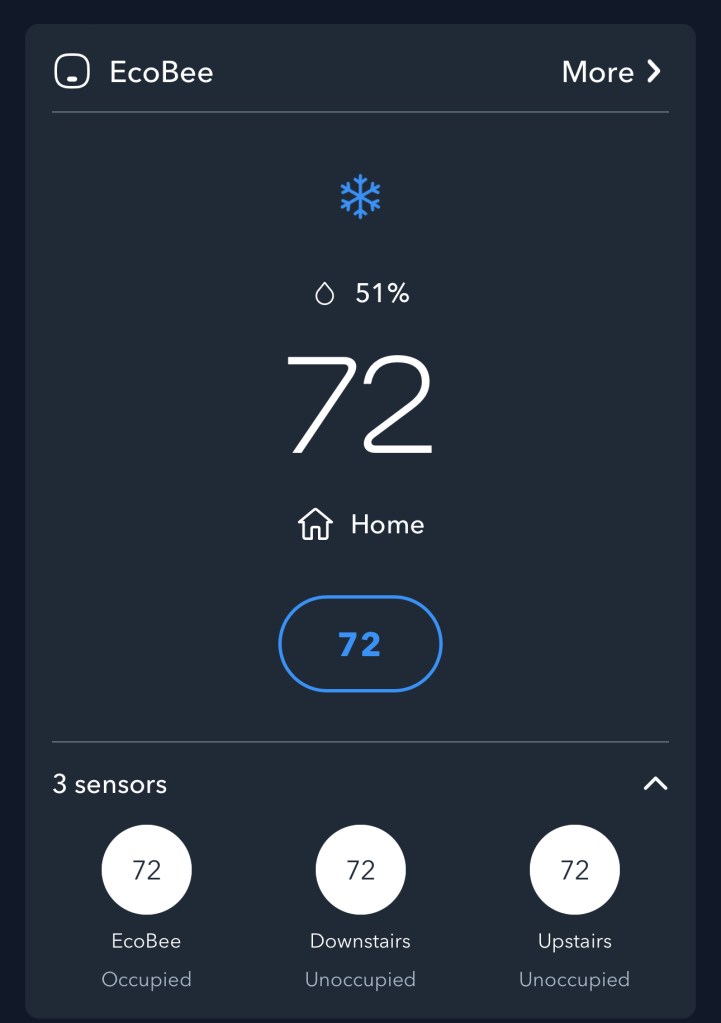
- Either have a smart thermostat or smart temperature sensor integrated to your Automation Hub. I have Ecobee.
- Optional – A 3d printer or access to one.
Knowledge
It is assumed in this article you have working knowledge of home automation and 3d printing. If you find that you need more information on some of these topics please feel free to contact me.
Making The Things Happen
If you already have Home Assistant and something similar to a Smart Things hub up and running then your next steps are as follows:
- Procure yourself a smart outlet that works with your automation environment. Follow all safety regulations for your locality when installing the outlet.
- Procure yourself a booster register that fits your HVAC register. Install the booster register and plug into the smart outlet.
- Add the smart outlet to your automation hub.
- If not already done, add your smart thermostat or smart temperature sensor to your automation hub. With Ecobee and Smart Things this was very easy integration.
Home Assistant Automation Routines
If you are new to Home Assistant then I recommend reading their page on the basics to help you get started. With Ecobee smart thermostat there is an entity associated with it call “Current Action” . This allows me to monitor the thermostat for when its changing from “Idle” to “Cooling”. Below is my automation routing to turn on the smart outlet I have the dumb register booster plugged into called “master bedroom outlet”. I also created an additional automation routine to monitor for when the “Current Action” changes back to “Idle” so I can turn the booster fan off.
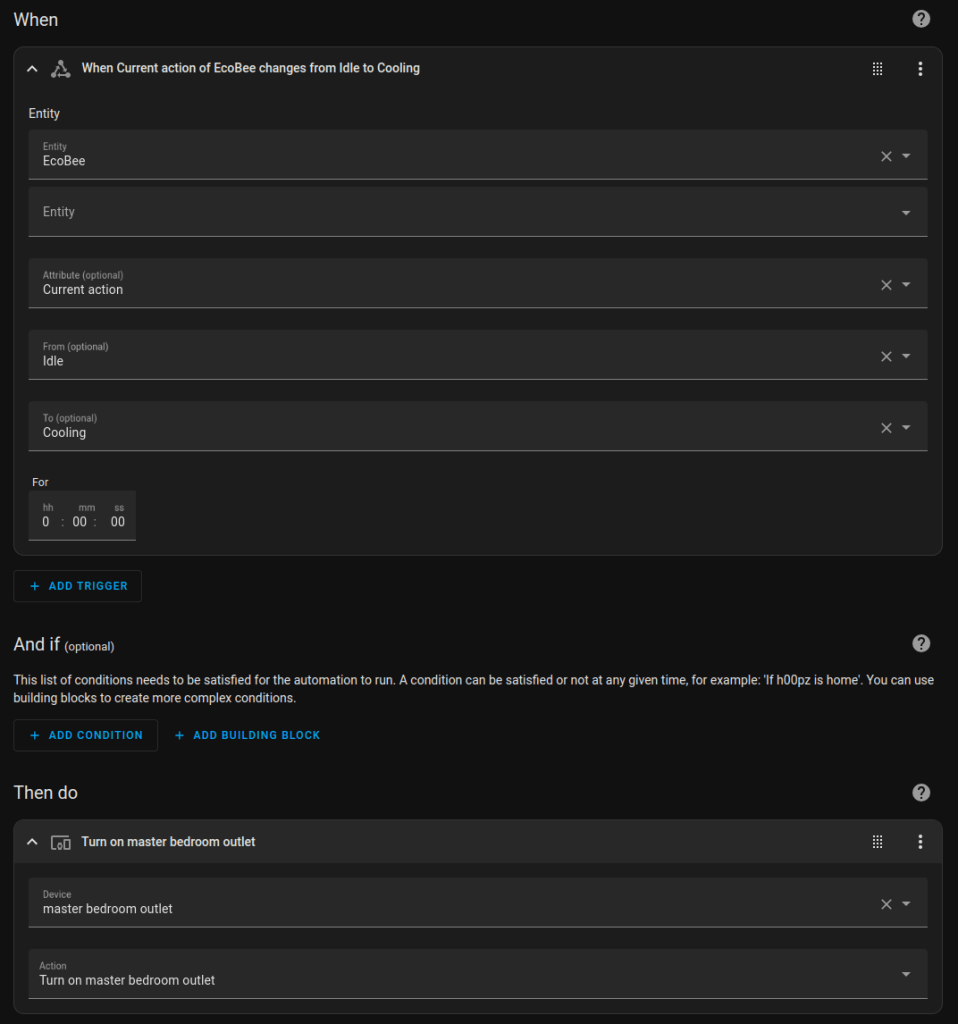
Not all smart thermostats are created equal so before you go down this journey I suggest importing your smart thermostat into your automation hub and/or Home Assistant to see what is and is not possible.
Re-Directing the Air Flow
one of the biggest problems I have is that my registers point horizontally off the side wall causing my cold airflow to sit on the floor and NOT cool the higher levels of air where we actually are when standing.
To solve this problem I designed a 3d model to re-direct the air from the register booster up and at a 25 degree outward.
You can find all my stl files on my printables page. I did not design this to click together, as I didn’t have to time to put into it I would have liked. I did however design it to be glued with CA glue.
Final Words
For those of you who obsess about getting solutions perfect I completely understand you. This heat/cooling has daunted me for years, playing the vent management game. To my peers who obsess I present this image to help you understand just how happy I am with this solution.